How to Make and Install Cut Vinyl Graphics
Chris Duke from Motorz TV https://www.motorz.tv shows you how vinyl vehicle graphics are made, and the tips and tricks to making sure the installation of your decal graphics kit goes smoothly.
Video Transcript

Preparing the vinyl graphic using software
“Today on Truck Block TV, we are going to teach you how to create and install vehicle graphics. Using plotting software, I open the artwork I previously created using vector based software. The plotter software allows me to specify quite a bit including the number of decals I want to make and the spacing between the decals. After I have positioned and sized the artwork, I feed my plotter a sheet of vinyl and send my artwork to the plotter so it can cut the decal.”
Read MoreSending the design to the plotter
“Our 24” plotter uses a precision razor blade mounted in a pivoting head so that it can move in all directions as the plotter moves the vinyl back and forth left to right. To score the vinyl, the plotters head applies slight pressure the vinyl, but not enough to cut the paper backing.”
Preparing the cut vinyl graphic
“To separate the decal from the large roll of vinyl, I use a scotch paper cutter. After the plotter has scored the vinyl, it’s time to remove the excess material that we don’t want from the paper. I use a weeding tool, which is basically a thick pin to lift off the vinyl I want removed.
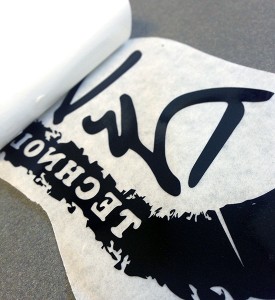
“Now I apply a sheet of transfer paper to the top of the vinyl. This is what you use when applying the decal to the vehicle. Next, using a squeegee, I adhere the transfer sheet to the vinyl and remove any air bubbles that might still be trapped. Finally, I us the scotch paper cutter to trim off the excess transfer paper.
The tools you need to get the job done can be purchased at your local sign shop rather inexpensively. They include a plastic squeegee, a pair a scissors or a scotch paper cutter like I used, a weeding tool, an Exact-o knife, and a roll of transfer tape.
Making your own decals is not expensive, but it does require a lot of time, patience, and labor.”
Preparing the vehicle for the decal
Now the first thing you want to do is make sure your trucks real clean. Grab some decal spray, a microfiber cloth, and put in some elbow grease.
Now that we have determined the size and cut our vehicle graphic, let’s hold it up to the truck and check for fitment making note of door handles and door jams, and you might need a buddy for this part.
Using masking tape, you want to create a hinge at the top of each letter using two pieces of tape. Then we are going to use this scotch razor blade tool here which has a razor blade inside and a protective piece right here so you don’t scratch your truck and we are going to cut each letter.”
Applying the vinyl cut decal to the vehicle
“To apply each letter we are going to use some application fluid and a squeegee, both available from your local sign shop.
Using this hinge we created with the masking tape, we are going to lift up each letter, peel off the backing. We are going to spray some application fluid on the truck and slowly laying down the graphic, we are going to get the application fluid out of there from the center pressing out as much as you can.
It’s been about 15 minutes and we are going to start removing the application tape from the “T”. We’re going to use a squeegee with a Teflon sleeve on it to work out any remaining bubbles. The Teflon sleeve is going to make sure we don’t scratch any of that vinyl.”