Digital Print Media

Wide Format Print Media Applications and Tips

  • Vinyl Wrapping
  • Wall
  • Window
  • Floor Graphics
  • Print Head Cleaning

How to Prepare Your Floors for a New Floor Graphic

January 8, 2019 By Digital Print Media Editor

Using floor graphics is a powerful way to convey messages. These wonderful graphics have a whole range of useful applications. Just a few examples include sales messages in stores and malls, wayfinding in hospitals or airports, or safety messages in warehouses and factories.

When selecting floor graphic inkjet media, the material should meet anti-slip standards such as those set by ANSI/NFSI (American National Standards Institute/National Floor Safety Institute) and various R (ramp test) ratings (UK).
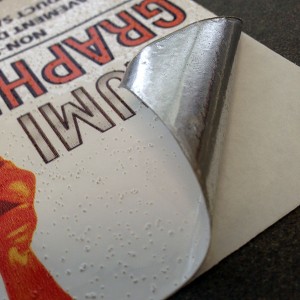
AlumiGraphics GRIP contains an aggressive adhesive that is designed to be removed without leaving residue behind.

It is good practice to use media with a removable adhesive so that it can be removed without leaving stains or marks on the application surface. Most important is the use of a good laminate (if the media requires it). This is primarily to provide a slip-resistant surface and make sure the installation is safe to be walked on, but it also helps to protect the image from damage.

Golden rules

Regardless of the surface, it needs to be clean and dry. Avoid application in the cold as this will impact the effectiveness of the adhesive.

A good way to start any application is to lay the graphic on the floor where you want it to be with the backing still on. Stick the graphic to the floor using tape to show the final location, cutting the tape to allow installation. By doing this, you can line the graphic up perfectly by matching up the tape as a guide.

Never overlap more than one layer of laminate as this can cause a tripping hazard. Round corners and seal the edges, especially if mechanical cleaning will be employed.

Tiled and laminate floors
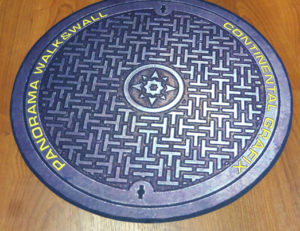
panoRama Walk & Wall is a diverse product suitable for a almost any indoor flat floor or wall surface.

Tiled and laminate floors are typical in shops and offices. Make sure you remove dust and lint, then clean the floor with good detergent and water. There are a variety of industrial-grade mopping systems designed to make this process easy. After this, wipe it down with isopropyl alcohol.

Prepare an area larger than the graphic to make sure you’ve cleaned everywhere you need to and allow the surface to dry completely before application.

Carpet floor

Vacuum thoroughly to remove as much dust and lint as you can. Try to avoid getting the area wet as it needs to be dry before application. Tacky rollers can help further remove lint and loose particles from the surface.

Use a print media with an ‘aggressive adhesive’ as this will help keep the graphic attached the the carpet surface. Make sure you press down the edges again once applied to ensure they are down tight. Edges that curl can cause tripping, which is something everyone wants to avoid. 
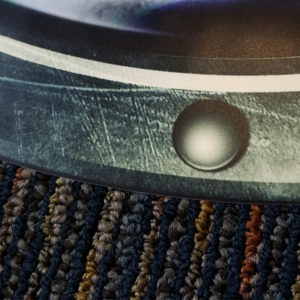
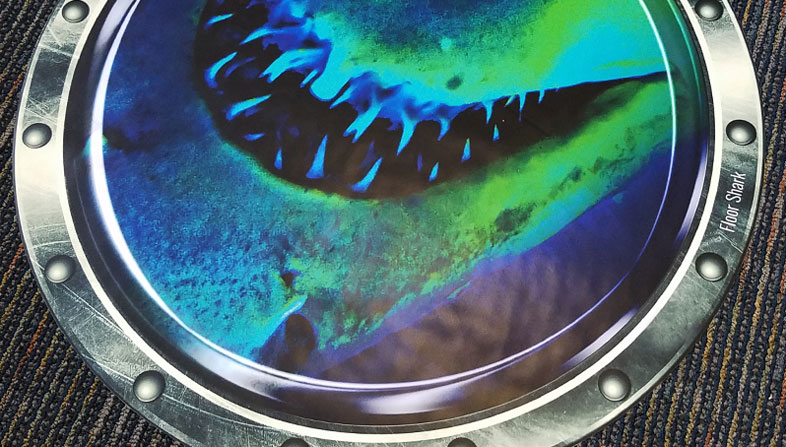
FloorShark® 170TFG is a textured floor graphic polyester film designed for carpet and a variety of other flat surfaces.

Asphalt and concrete

Brush off all the loose dirt and stones from the area. If you wash with water, make sure the area is completely dry before application and that the ambient temperature is at least 50°F. Make sure to use floor graphic media that’s designed for outdoor surfaces.

We recommend Alumigraphics GRIP for longer-term outdoor floor graphic applications and Mactac StreetTRAX™ or IMAGin® StreetRAP™ for short to medium-term applications.
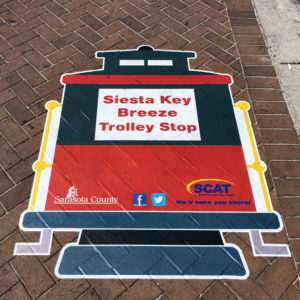
Mactac StreetTRAX features 2 month outdoor durability and is designed for gritty surfaces.

Mactac PERMACOLOR® FloorGRIP PF6600 is our recommended laminate for indoor and outdoor inkjet media. Be sure to read the manufacturers recommendations because some inkjet media does not require an overlaminate

With the right material and installation, your new floor graphic is going to look amazing. With a little care, your floor graphic will look great for ages to come.
Filed Under: Digital Print Media News, Floor Graphics

Perfecting Surface Prep Before Wrapping a Vehicle

December 14, 2018 By Digital Print Media Editor

Perfecting Surface Prep Before Wrapping a Vehicle

Are you ready to wrap?

Vehicle wraps are a great way to advertise a business or add flair to a plain-looking car, van, or truck. A very important part in beginning the process is preparing the surface. The last thing you want is a shoddy-looking finish for your vehicle wrap or a small particle of dirt to disturb the adhesion process. Here are the simple and straightforward steps to get your vehicle prepared.

Step 1: Overall General Cleaning

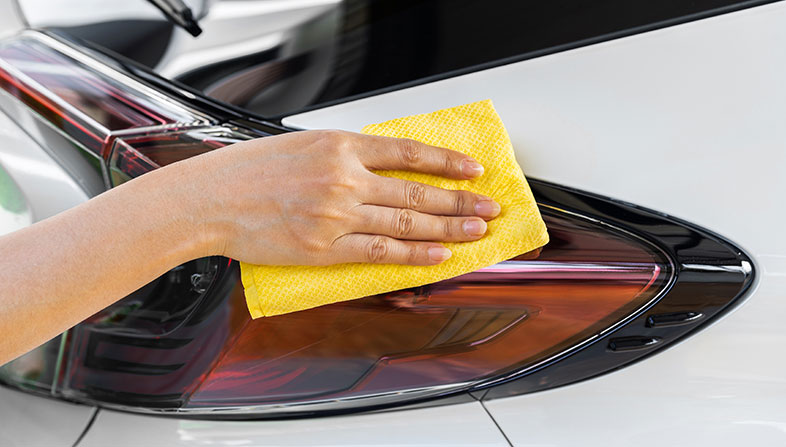
Your vehicle needs a general overall clean with basic mild soap and water. All wax and debris must be removed from the surface. Hand washing is the best method. Use a microfiber cloth with a mixture of a general dish soap mixed in a large bucket of water.

Step 2: Cracks and Corners

Pay extra attention to those cracks and corners when cleaning the surface. This will help the wrap to adhere properly when all those little faults are scrubbed and smoothed out.

Missing a fault can cause the wrap adhesive to fail, which then costs even more time and money to get it right. Take the time to thoroughly go over the entire surface to avoid costly errors or having to start the process again.

Step 3: Cleaning Solution

Once you’ve thoroughly cleaned the entire surface, a cleaning solution should be applied. Mix equal parts isopropyl alcohol and water to make the solution. Spray directly onto the surface and immediately wipe with a lint-free cloth. This solution completely cleans the surface of soap, water, or any remaining dirt.

Step 4: Dry

Using another microfiber cloth, it is now time to dry the surface completely. It’s a good idea to take the time needed to dry all over the vehicle. Once your vehicle is totally dry, you’re all set to wrap.

Follow these simple and easy steps to prepare your vehicle for a sleek wrap that hugs all the curves and corners without any lumps or bumps. This is a time-consuming job, but it will be well worth it for the finished product. Cutting corners, such as not making sure the vehicle surface is completely clean, will result in the wrap not adhering properly to the surface.

Filed Under: Digital Print Media News, Vinyl Wrapping

  • « Previous Page
  • 1
  • 2
  • 3
  • 4
  • 5
  • …
  • 141
  • Next Page »

Featured Publications

Continental Graphix – Non-adhesive and self-adhesive high quality perforated media

LARGE FORMAT WINDOW GRAPHICS MEDIA Continental Grafix is a manufacturer of perforated specialty media. Continental is one of … [Read More...]

MACtac® Specialty Products Advances Rubber Adhesive Technology

MACtac 593XT adhesive available in three calipers for functional applications MACtac® Specialty Products advances its trusted … [Read More...]

SealitPen – Vinyl Graphic Edge Sealer Pen

The Seal-it-Pen is a vinyl graphic edge sealer pen that saves time when it comes to sealing the edges of all types of vinyl … [Read More...]

Best Royalty Free Stock Photos

Looking for a royalty free stock photo site? With so many sites offering this service, it can be difficult to decide what the best … [Read More...]

Tips on Wide Format Printing

  • High-Tack Inkjet Vinyl – When to Use It?
  • Why Use FSC® Certified Eco-Friendly Print Media?
  • Advantages of Using a Foam Roller for Installing Graphics
  • How To Create A Successful Wallcovering
  • New StreetTRAX Floor Graphic – No Laminate Required!

Read More

Subscribe

Enter your email address to subscribe to Digital Print Media and receive notifications of new posts by email.

Media Finder

Read About

  • Backlit Signage (4)
  • Digital Print Media News (277)
  • Floor Graphics (52)
  • Print Head Cleaning (9)
  • Vinyl Wrapping (81)
  • Wall Graphics (77)
  • Window Graphics (39)

Search Images or Articles

Recent Posts

  • Latex Printer Compatible Fabric and Textile Print Media
  • Graphics for ATVs – Print Media Guide
  • Boat Wraps: An Overview
  • Clear Adhesive Overlaminates for Windows: Application Tips & Tricks

Subscribe to Digital Print Media

Be the first to receive product updates, industry news, and installation and finishing tips.

Top Posts & Pages

  • HP Indigo Digital Presses Helped Make “Share a Coke” Campaign a Hit
  • Comparing the HP Latex 335 and the HP Latex 365
  • How to Install Floor Graphic on Concrete
  • Vinyl Wrapping
  • Wall Graphics
  • Window Graphics
  • Floor Graphics
  • Backlit Signage
  • Print Head Cleaning

Copyright © 2025 Digital-Print-Media.com

This website uses cookies to improve your experience. We'll assume you're ok with this, but you can opt-out if you wish.Accept Read More
Privacy & Cookies Policy

Privacy Overview

This website uses cookies to improve your experience while you navigate through the website. Out of these, the cookies that are categorized as necessary are stored on your browser as they are essential for the working of basic functionalities of the website. We also use third-party cookies that help us analyze and understand how you use this website. These cookies will be stored in your browser only with your consent. You also have the option to opt-out of these cookies. But opting out of some of these cookies may affect your browsing experience.
Necessary
Always Enabled
Necessary cookies are absolutely essential for the website to function properly. This category only includes cookies that ensures basic functionalities and security features of the website. These cookies do not store any personal information.
Non-necessary
Any cookies that may not be particularly necessary for the website to function and is used specifically to collect user personal data via analytics, ads, other embedded contents are termed as non-necessary cookies. It is mandatory to procure user consent prior to running these cookies on your website.
SAVE & ACCEPT